Dynamic cubemaps with OpenGL 2
The "problem"
If you are using traditional cubemap environment maps you get nice reflections and refractions, but they are static, as they are usually defined by a single texture read from the disk. The problem is quite similar to the FBOs in OpenGL, whereas an FBO could act like a framebuffer render target, and the attached textures could be bound to be read from without the need to copy back the contents of the backbuffer.
FBOs and cubemaps can be combined, unfortunately it’s not really intuitive how to do this. Here are my notes on the problem, hope they might help someone else ... From shader version 4 on, (OpenGL 3.0+ I think), it is possible to use the geometry shader to write all sides of the cubemap in one draw call, by using layers. Unfortunately I was not able to try that (fix your damn video drivers, Apple!). The method I use takes a bit longer, but works just as well and on older hardware.
First, you have to create your cubemap and FBO. Once that is done, you can pass this cubemap to your shader or use it during fixed-function calls and it will just work. To update it (and that’s what you want), you use the following method:
Remember that you have to render your scene 6 times to update the cube map! To setup the matrices, check which side of the cubemap your are updating and create a ratio 1:1, 90deg frustum to cover that area of the world. Remember to translate it to where you want your cubemap to be centered around! (Still, all the contents of the cubemap are though of being ‘infinitely far’ away). Note that the rotation is not important, as you want your cubemap to be in world coordinates anyway. That is, if you have a wold-coordinate vector pointing towards the X-axis, you want it to hit the positive x side of the cube as well ...
As each cubemap update contains 6 calls to render the whole scene, it’s a good idea to only update it if needed. Additionally, make sure the cubemap’s resolution is not too high -- it does not need to be anyway. The cubemap might be centered on an object, and provide only reflections/refractions for a single object. In that case, it should be updated when the object moves.
Creating the write-able cube map
Alright, here’s the commented code on how to create FBO-cubemaps in OpenGL.
// create the cubemap
glGenTextures(1, &cubemap);
glBindTexture(GL_TEXTURE_CUBE_MAP, cubemap);
glTexParameteri(GL_TEXTURE_CUBE_MAP, GL_TEXTURE_WRAP_S, GL_CLAMP);
glTexParameteri(GL_TEXTURE_CUBE_MAP, GL_TEXTURE_WRAP_T, GL_CLAMP);
glTexParameteri(GL_TEXTURE_CUBE_MAP, GL_TEXTURE_WRAP_R, GL_CLAMP);
glTexParameteri(GL_TEXTURE_CUBE_MAP, GL_TEXTURE_MIN_FILTER, GL_LINEAR);
glTexParameteri(GL_TEXTURE_CUBE_MAP, GL_TEXTURE_MAG_FILTER, GL_LINEAR);

// set textures
for (int i = 0; i < 6; ++i)
    glTexImage2D(GL_TEXTURE_CUBE_MAP_POSITIVE_X + i, 0, GL_RGB, width, height, 0, GL_RGB, GL_UNSIGNED_BYTE, 0);

// create the fbo
glGenFramebuffers(1, &framebuffer);
glBindFramebuffer(GL_FRAMEBUFFER, framebuffer);

// create the uniform depth buffer
glGenRenderbuffers(1, &depthbuffer);
glBindRenderbuffer(GL_RENDERBUFFER, depthbuffer);
glRenderbufferStorage(GL_RENDERBUFFER, GL_DEPTH_COMPONENT, width, height);
glBindRenderbuffer(GL_RENDERBUFFER, 0);

// attach it
glFramebufferRenderbuffer(GL_FRAMEBUFFER, GL_DEPTH_ATTACHMENT, GL_RENDERBUFFER, framebuffer);


// attach only the +X cubemap texture (for completeness)
glFramebufferTexture2D(GL_FRAMEBUFFER, GL_COLOR_ATTACHMENT0, GL_TEXTURE_CUBE_MAP_POSITIVE_X, cubemap, 0);

// this function just checks for framebuffer completeness and throws and exception if it’s not happy
verifyStatus();

// disable
glBindFramebuffer(GL_FRAMEBUFFER, 0);
glBindTexture(GL_TEXTURE_CUBE_MAP, 0);
And here’s the method on how to begin rendering to a specified cube face. Assume it has a Vector3 variable that contains the world position for the center of the cubemap.
// iterate over this variable six times, once for each face. See below
int face = 0;

// attach new texture and renderbuffer to fbo
glFramebufferTexture2D(GL_FRAMEBUFFER, GL_COLOR_ATTACHMENT0, GL_TEXTURE_CUBE_MAP_POSITIVE_X + (int)face, cubemap, 0);
verifyStatus();

// clear
glClear(GL_COLOR_BUFFER_BIT|GL_DEPTH_BUFFER_BIT);

glMatrixMode(GL_PROJECTION);
glLoadIdentity();
// play around with the near and far values
gluPerspective(90, 1, 1, 1000);

glMatrixMode(GL_MODELVIEW);
glLoadIdentity();

// setup lookat depending on current face
switch (face)
{
    case POSITIVE_X:
        gluLookAt(0, 0, 0, 1, 0, 0, 0, 1, 0);
        break;

    case NEGATIVE_X:
        gluLookAt(0, 0, 0, -1, 0, 0, 0, 1, 0);
        break;

    case POSITIVE_Y:
        gluLookAt(0, 0, 0, 0, 10, 0, 1, 0, 0);
        break;

    case NEGATIVE_Y:
        gluLookAt(0, 0, 0, 0, -10, 0, 1, 0, 0);
        break;

    case POSITIVE_Z:
        gluLookAt(0, 0, 0, 0, 0, 10, 0, 1, 0);
        break;

    case NEGATIVE_Z:
        gluLookAt(0, 0, 0, 0, 0, -10, 0, 1, 0);
        break;

    default:
        break;
};

glTranslatef(-renderPosition.x, -renderPosition.y, -renderPosition.z);

// ready to draw here
All of this is packed into a class that stores all the GLuints and the method calls. Let’s call this class CubemapFramebuffer. Then you are able to just call:
CubemapFramebuffer cfbo;

// bind the fbo, save our OpenGL state
cfbo.beginRendering();
for (int i = 0; i < 6; ++i)
{
    // attach the correct cube face, clear it and set up the matrices
    cfbo.drawToFace(i);
    // draw the scene
    drawScene();
}
// unbind fbo, return to backbuffer rendering, cubemap is now ready to use
cfbo.endRendering();
There were some problems with the cubemap being upside-down. You can correct for this either by mirroring the texture matrix, or passing some (0,-1,0) up vectors in the gluLookAt function.
Shaders and the model matrix
The shaders have two functions: calculate the refraction and reflection and access the correct texels in the cubemap. We stored the cubemap in world coordinates, so we have to provide the vec3 for the cubemap access in world coordinates as well. However, if we multiply the normal or vertex with OpenGL’s ModelViewMatrix, we get the eye coordinates. A lot of tutorials have matrices that transform from eye to world coordinates, but that makes the code harder to read and is in my view unnecessary. The solution is that you have to provide your shader with your own modelmatrix. You can either pass it in through a uniform mat4 variable, but another way is to use all the other unused texture matrices and the (deprecated) fixed-function matrix operations, like glTranslate, glRotate, ...
If you have set up everything and are ready to draw an object.
// first switch to an unused texture matrix (I usually use matrix 7);
glActiveTexture(GL_TEXTURE7)
glMatrixMode(GL_TEXTURE);
// reset the matrix
glLoadIdentity();
// apply the transform
glTranslatef( ... );
glRotatef( ... );
// and switch back to the first texture and the modelview matrix
glActiveTexture(GL_TEXTURE0);
glMatrixMode(GL_MODELVIEW);
If you have a chain of transformations you start at the identity but instead of applying gluLookAt or something similar, you keep the matrix to the identity. After that you just mirror every operation on the modelviewmatrix also on texture matrix 7.
Please note that the matrix operations have all been deprecated since OpenGL3, however it’s still quite convenient if you want to ‘just test something’. The proper way would be to pass all of your matrices directly to the shader. In that case you would probable have separate model and view matrices anyway.
At that stage we have finally the model matrix passed to the shader and we are able to perform all lighting calculations in world space. The vertex shader’s responsibility is to just calculate the needed interpolated world coordinates.
// we pass through the normal and the position of this vertex in world coordinates
varying vec3 normal;
varying vec4 position;

// the model matrix is stored in the second texture matrix
mat4 ModelMatrix = gl_TextureMatrix[7];
// the normal matrix is the top-left 3x3 inverse transpose of the modelmatrix
mat3 NormalMatrix = mat3(gl_TextureMatrixInverseTranspose[7][0].xyz, gl_TextureMatrixInverseTranspose[7][1].xyz, gl_TextureMatrixInverseTranspose[7][2].xyz);

void main()
{
    // normal OpenGL
    gl_Position = gl_ModelViewProjectionMatrix * gl_Vertex;

    // calucate the world position and normal
    position = ModelMatrix * gl_Vertex;
    normal = NormalMatrix * gl_Normal;
}
The fragment shader is where all the magic happens:
  // world position + normal of vertex;
  varying vec3 normal;
  varying vec4 position;

  // world position of camera
  uniform vec3 eyePosition;

  struct Material
  {
      vec3    baseColor;
      float    transparency;
      float    reflectivity;
      // ratio btw refraction and reflection
      float    fresnelTerm;
  };

  uniform Material    material;

  // the world position of a point light
  uniform vec3 lightPosition;


  // our environment map
  uniform samplerCube    cubemap;


  void main()
  {
      // calculate normalized normal, eye and light ray
      vec3 N = normalize(normal);
      vec3 L = normalize(lightPosition-position.xyz);
      vec3 eyeRay = normalize(position.xyz-eyePosition);

      // the two fresnel parts - reflection and refraction (mirror and see-through)
      vec3 reflection = textureCube(cubemap, reflect(eyeRay, normal)).rgb;
      vec3 refraction = textureCube(cubemap, refract(eyeRay, normal, 1.1)).rgb;

      // diffuse phong lighting
      vec3 diffuseColor = material.baseColor * max(0.0, dot(N, L));

      // solid color is a mixture between the reflectance and the diffuse term
      vec3 solidColor = mix(diffuseColor, reflection, material.reflectivity);

      // the final color is a mix between the solid and the transparent color
      vec3 color = mix(refraction, solidColor, material.transparency);

      gl_FragColor = vec4(color, 1.0);
  }
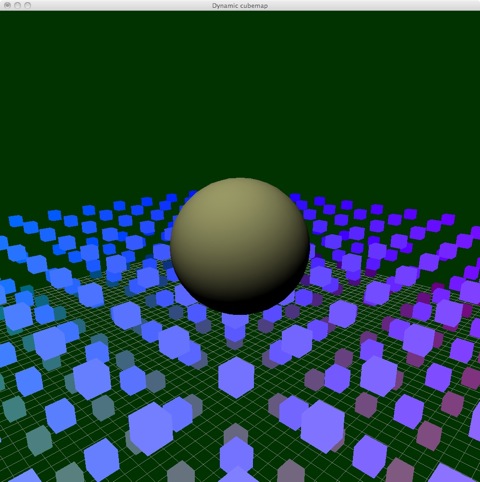
First, we have a very bare-bone material description, just containing a diffuse color, some [0..1] bound values for transparency and reflectivity. Because we are now dealing in world space, we have to explicitly pass the world coordinates of our camera. We also define a single point light for diffuse lighting.
The first thing to do is calculate some normalized rays for the light, the normal and the viewing direction. We then access the cubemap using GLSLs reflect and refract methods; both require the normal vector. The diffuse colour is calculated using the phong dot-product formula. Finally, we mix our colour based on reflectivity and refractivity. (And I just noted that you might want to adjust the outgoing alpha value depending on the transparency).
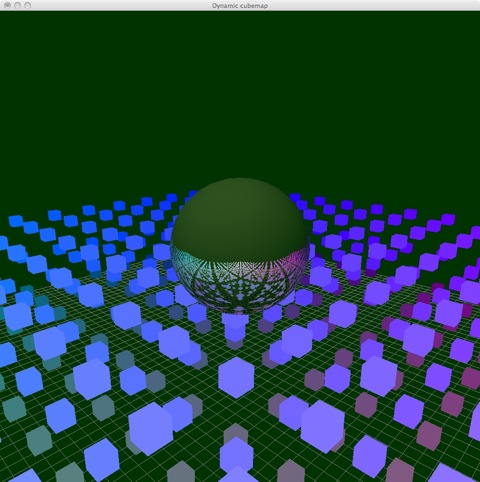
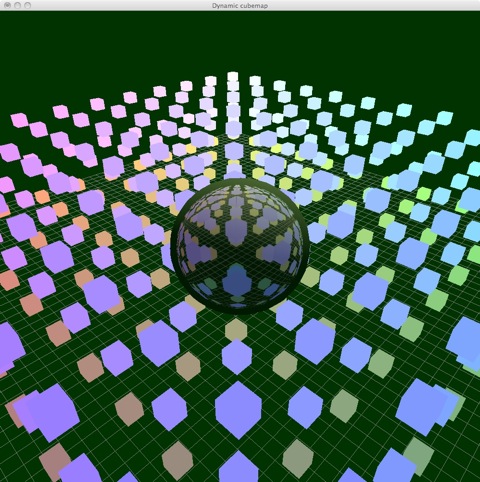
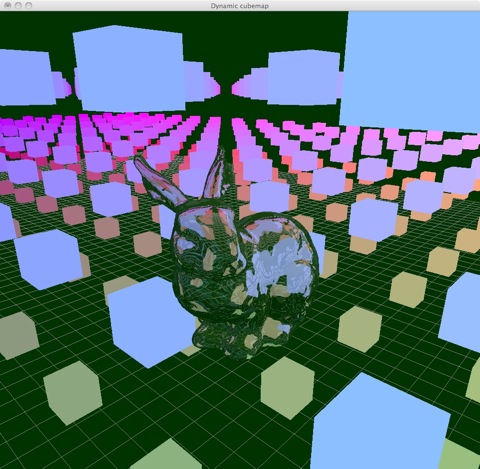
Pictures
From top to bottom:

Drawbacks
This method is good for nice-looking reflections/refractions but suffers from some problems.
First, there is no self-interaction, that is the bunny will not reflect or refract itself. This issue can only be solved by either subdiving the geometry further and -- in the extreme case -- have one environment map per triangle or by ray tracing. However the lack of self-reflections is usually not noticeable.
Secondly, the underlying idea of environment maps is that everything stored in the environment map is at an infinite distance which is clearly not the case in dynamic environments.
Similarly, the cubemap creation collapses the geometry for which the cube map is created into a single point. Curved reflections are therefore not really possible.